Skip to content

My Item is Flat

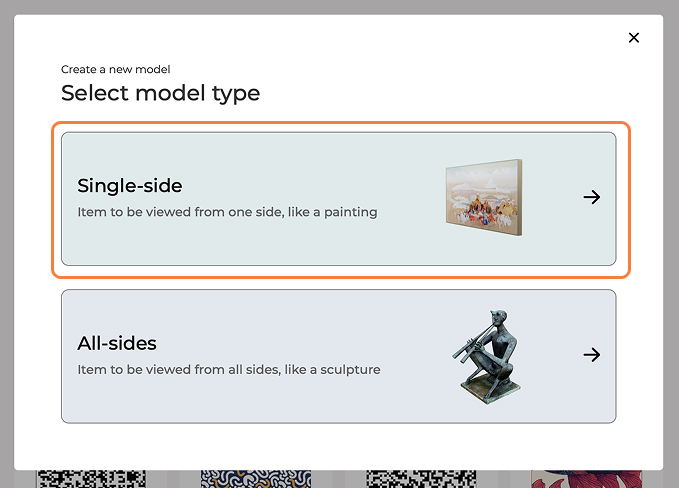
Convert a single image of a flat object, like a painting, artwork, or document, into a 3D model with enhanced surface detail. This method is ideal for preserving the nuances of flat media while adding a subtle sense of depth.

Process Overview

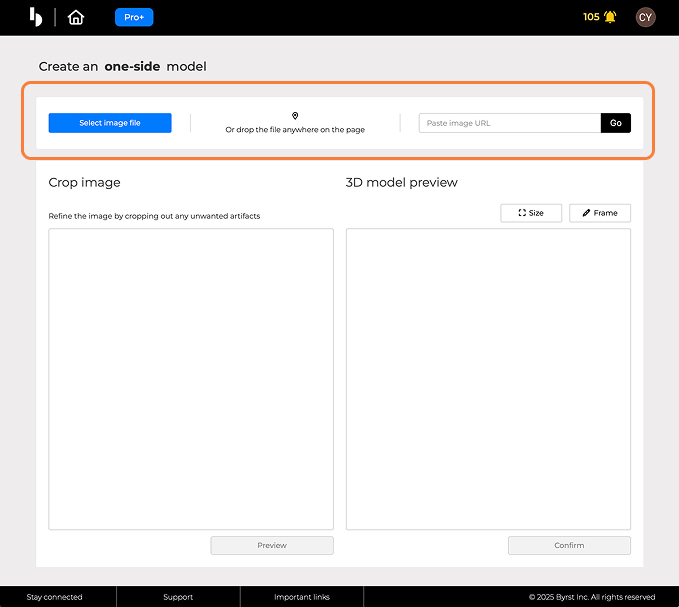
  1. Image Upload: Add an image of your flat object using one of the following methods:
    • Select a File: Click the "Select file" button to upload a local image from your disk.
    • Paste a URL: Copy and paste an image URL from a website into the "Paste image URL" field and click "Go".
    • Drag and Drop: Drag an image file from your computer and drop it anywhere on the page.
      We support JPG, PNG, WebP, AVIF, and HEIC formats. High resolution is crucial for capturing fine details.
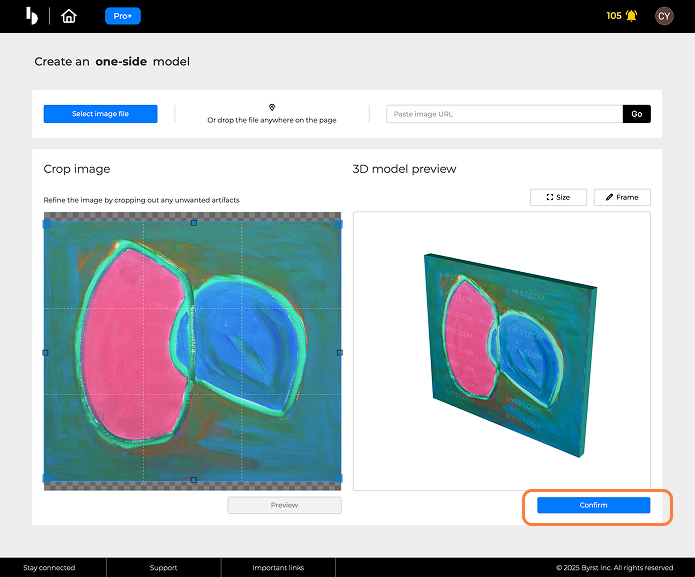
  2. Image Detection: Once the image is added, the source image window will attempt to identify the artwork. If the image includes a wall with a contrasting background, detection should work well, but manual adjustments may be required if the artwork is not detected properly.
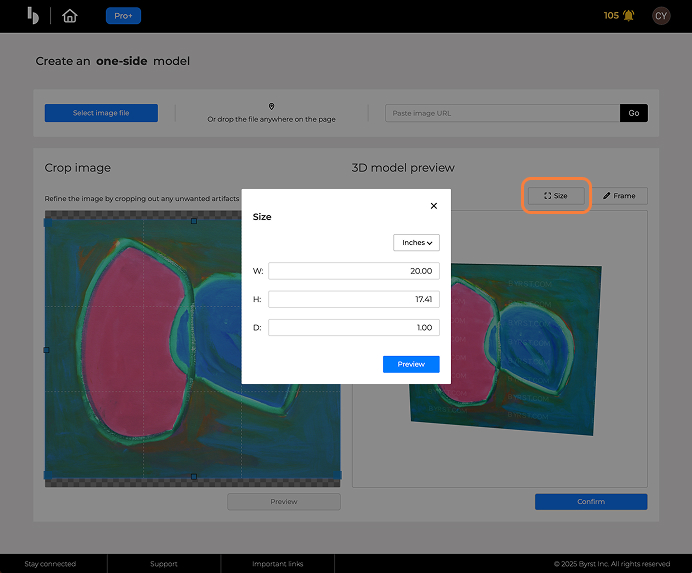
  3. Set Dimensions: Input the real-world dimensions of your artwork:
    • Width: Enter the width of the artwork in inches.
    • Height: Enter the height of the artwork in inches.
    • Depth: Enter the desired depth (thickness) of the 3D model in inches to enhance its visual representation.
  4. Customize Edge Color: Adjust the edge color of the 3D model to complement the artwork:
    • Click the color box to select a color from a color picker.
    • Alternatively, use the eyedropper tool to pick a color directly from the artwork that fits best.
  5. Preview the 3D Model: After making adjustments, click the "Preview" button to update the 3D model in the right window. Review the model and make further adjustments as needed.
  6. Confirm and Finalize: Once you are satisfied with the 3D model, click the "Confirm" button to process the final 3D model. The Byrst platform will generate the model, emphasizing the surface texture and details of the original flat image. This process typically takes a few seconds.

Input Image Guidelines

  • High Resolution: Use the highest resolution image possible. This is essential for capturing the fine details of your flat object.
  • Clear Details: Ensure the image is sharp and in focus. The more detail present in the 2D image, the more detail will be captured in the 3D model.
  • Front View: Capture a direct, front-facing view of the flat object. Avoid angled or perspective views.
  • Consistent Lighting: Use even and consistent lighting to avoid harsh shadows or reflections that could obscure surface details.
  • Contrasting Background: If the artwork is on a wall, a contrasting background helps with automatic detection.

Tips for Adjusting the 3D Model

  • Cropping: If the artwork is not cropped properly (e.g., due to a non-contrasting background), you may need to manually adjust the boundaries set in the source image window.
  • Preview: Use the "Preview" button to update how changes to dimensions or edge color affect the 3D model. This allows you to fine-tune the model until it looks correct.
  • Edge Color Selection: Choose an edge color that enhances the artwork’s appearance. Using the eyedropper to pick a color from the artwork often yields the best results for a cohesive look.